Blood Orange Double Chocolate Scones w/Blood Orange Butter


Oooh, deliciousness.

Yes, you read that title right. Blood Orange Double Chocolate Scones. Yum. Yum. YUM!

Again, this past week I asked my Facebook page fans to vote on which scone they wanted to make, and Orange Chocolate scones won by a couple of votes. The tie-breaker suggested the genius idea of using blood oranges, and another follower suggested dark chocolate, another fantastic idea. (But really–is there anything besides dark chocolate?) What resulted from these votes and ideas was absolute deliciousness.

I'm drooling...
I’m drooling…seriously.

So I was very excited to try my hand at these, using fresh oranges and the darkest cocoa powder I had. You literally use all but the pith (white part) and membranes of the orange in this recipe. You use the zest, the carpel (the juicy, fruity membranes), and the juice. This is a much more intensive recipe than I usually make due to the fresh oranges, but oh, so worth it. I do hope you find the time to try it, as I’ve received overwhelmingly positive feedback from everyone who has tried these.

Yield: ~24 medium scones
Prep time: 45-60 minutes
Chilling time: 15 minutes
Baking time: 20-25 minutes
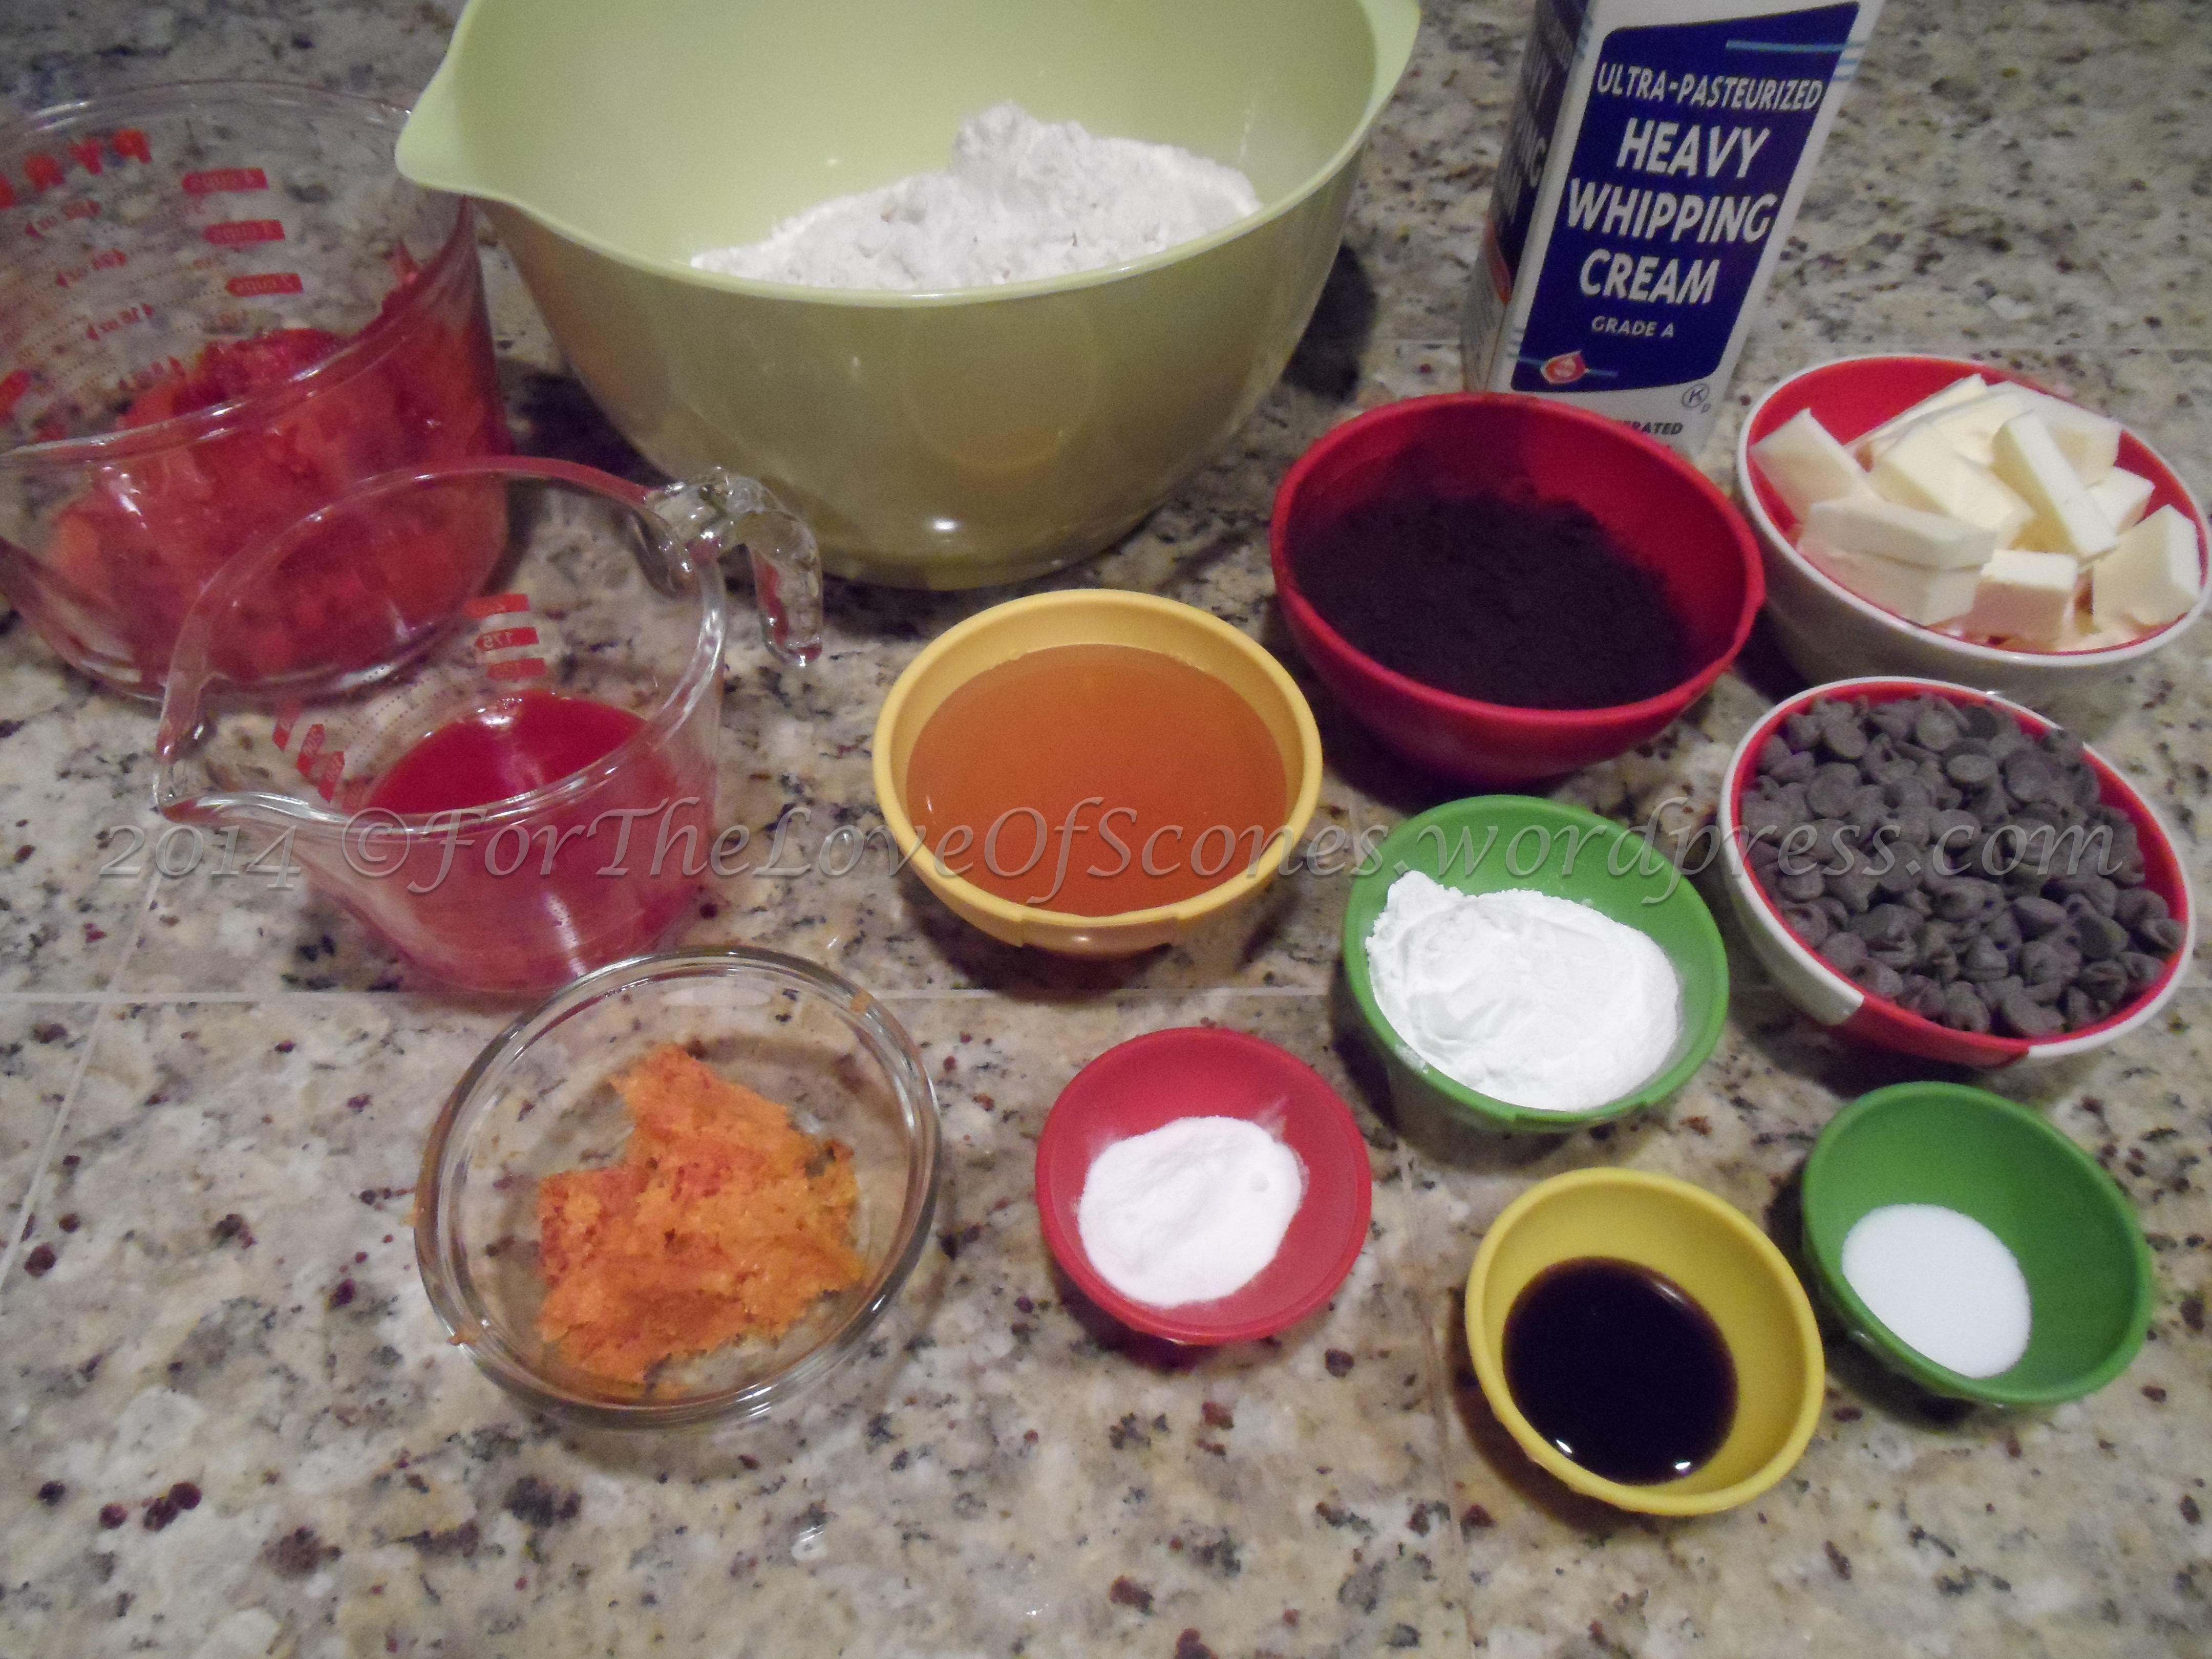
Ingredients:

Scone:

4 cups flour
2/3 cup unsweetened dark cocoa powder (as dark as you can find)
3 tbsp baking powder
2 tsp baking soda
1 tsp salt
10 tbsp unsalted butter
Generous 1/2 cup dark chocolate chips
2 tsp pure vanilla extract
1/2 cup honey
zest of 4 blood oranges
juice of 5 blood oranges
carpel of 4 blood oranges
about 1 cup whipping cream to make into a slightly sticky dough
pearl sugar (or coarse sugar) for sprinkling
Orange butter ingredients:
2 sticks butter, softened
1 blood orange, zest & carpel

Instructions:

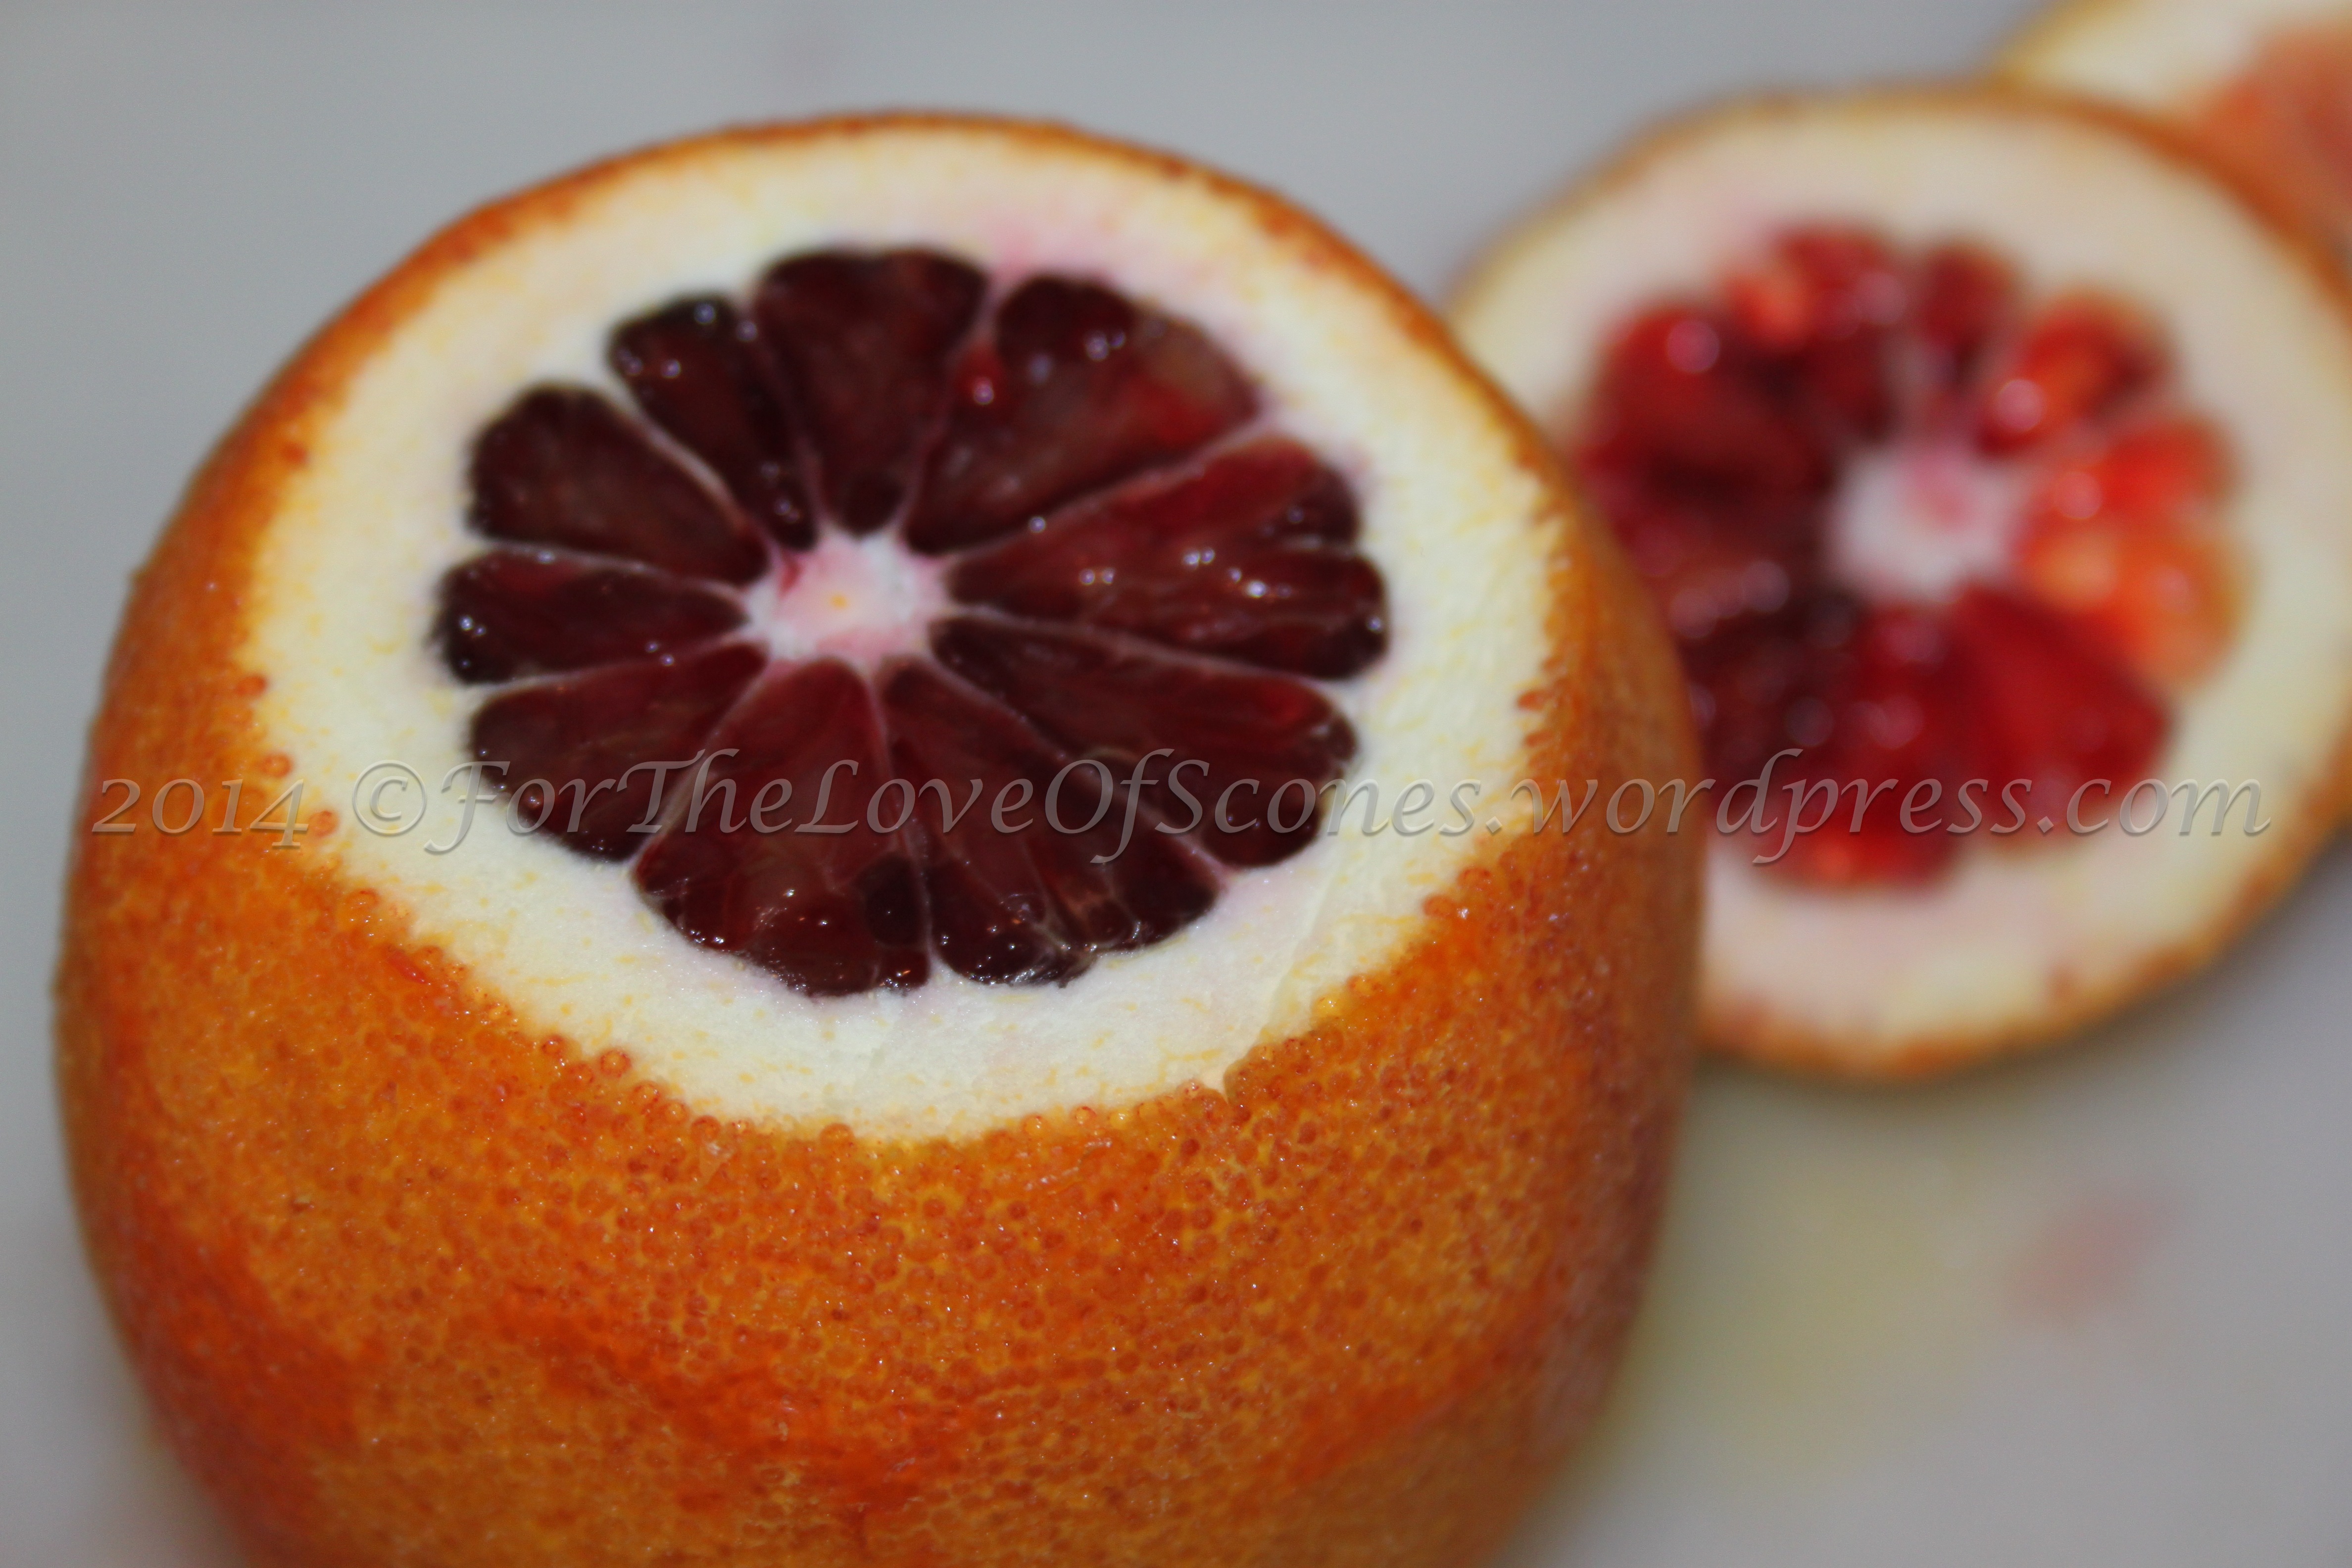
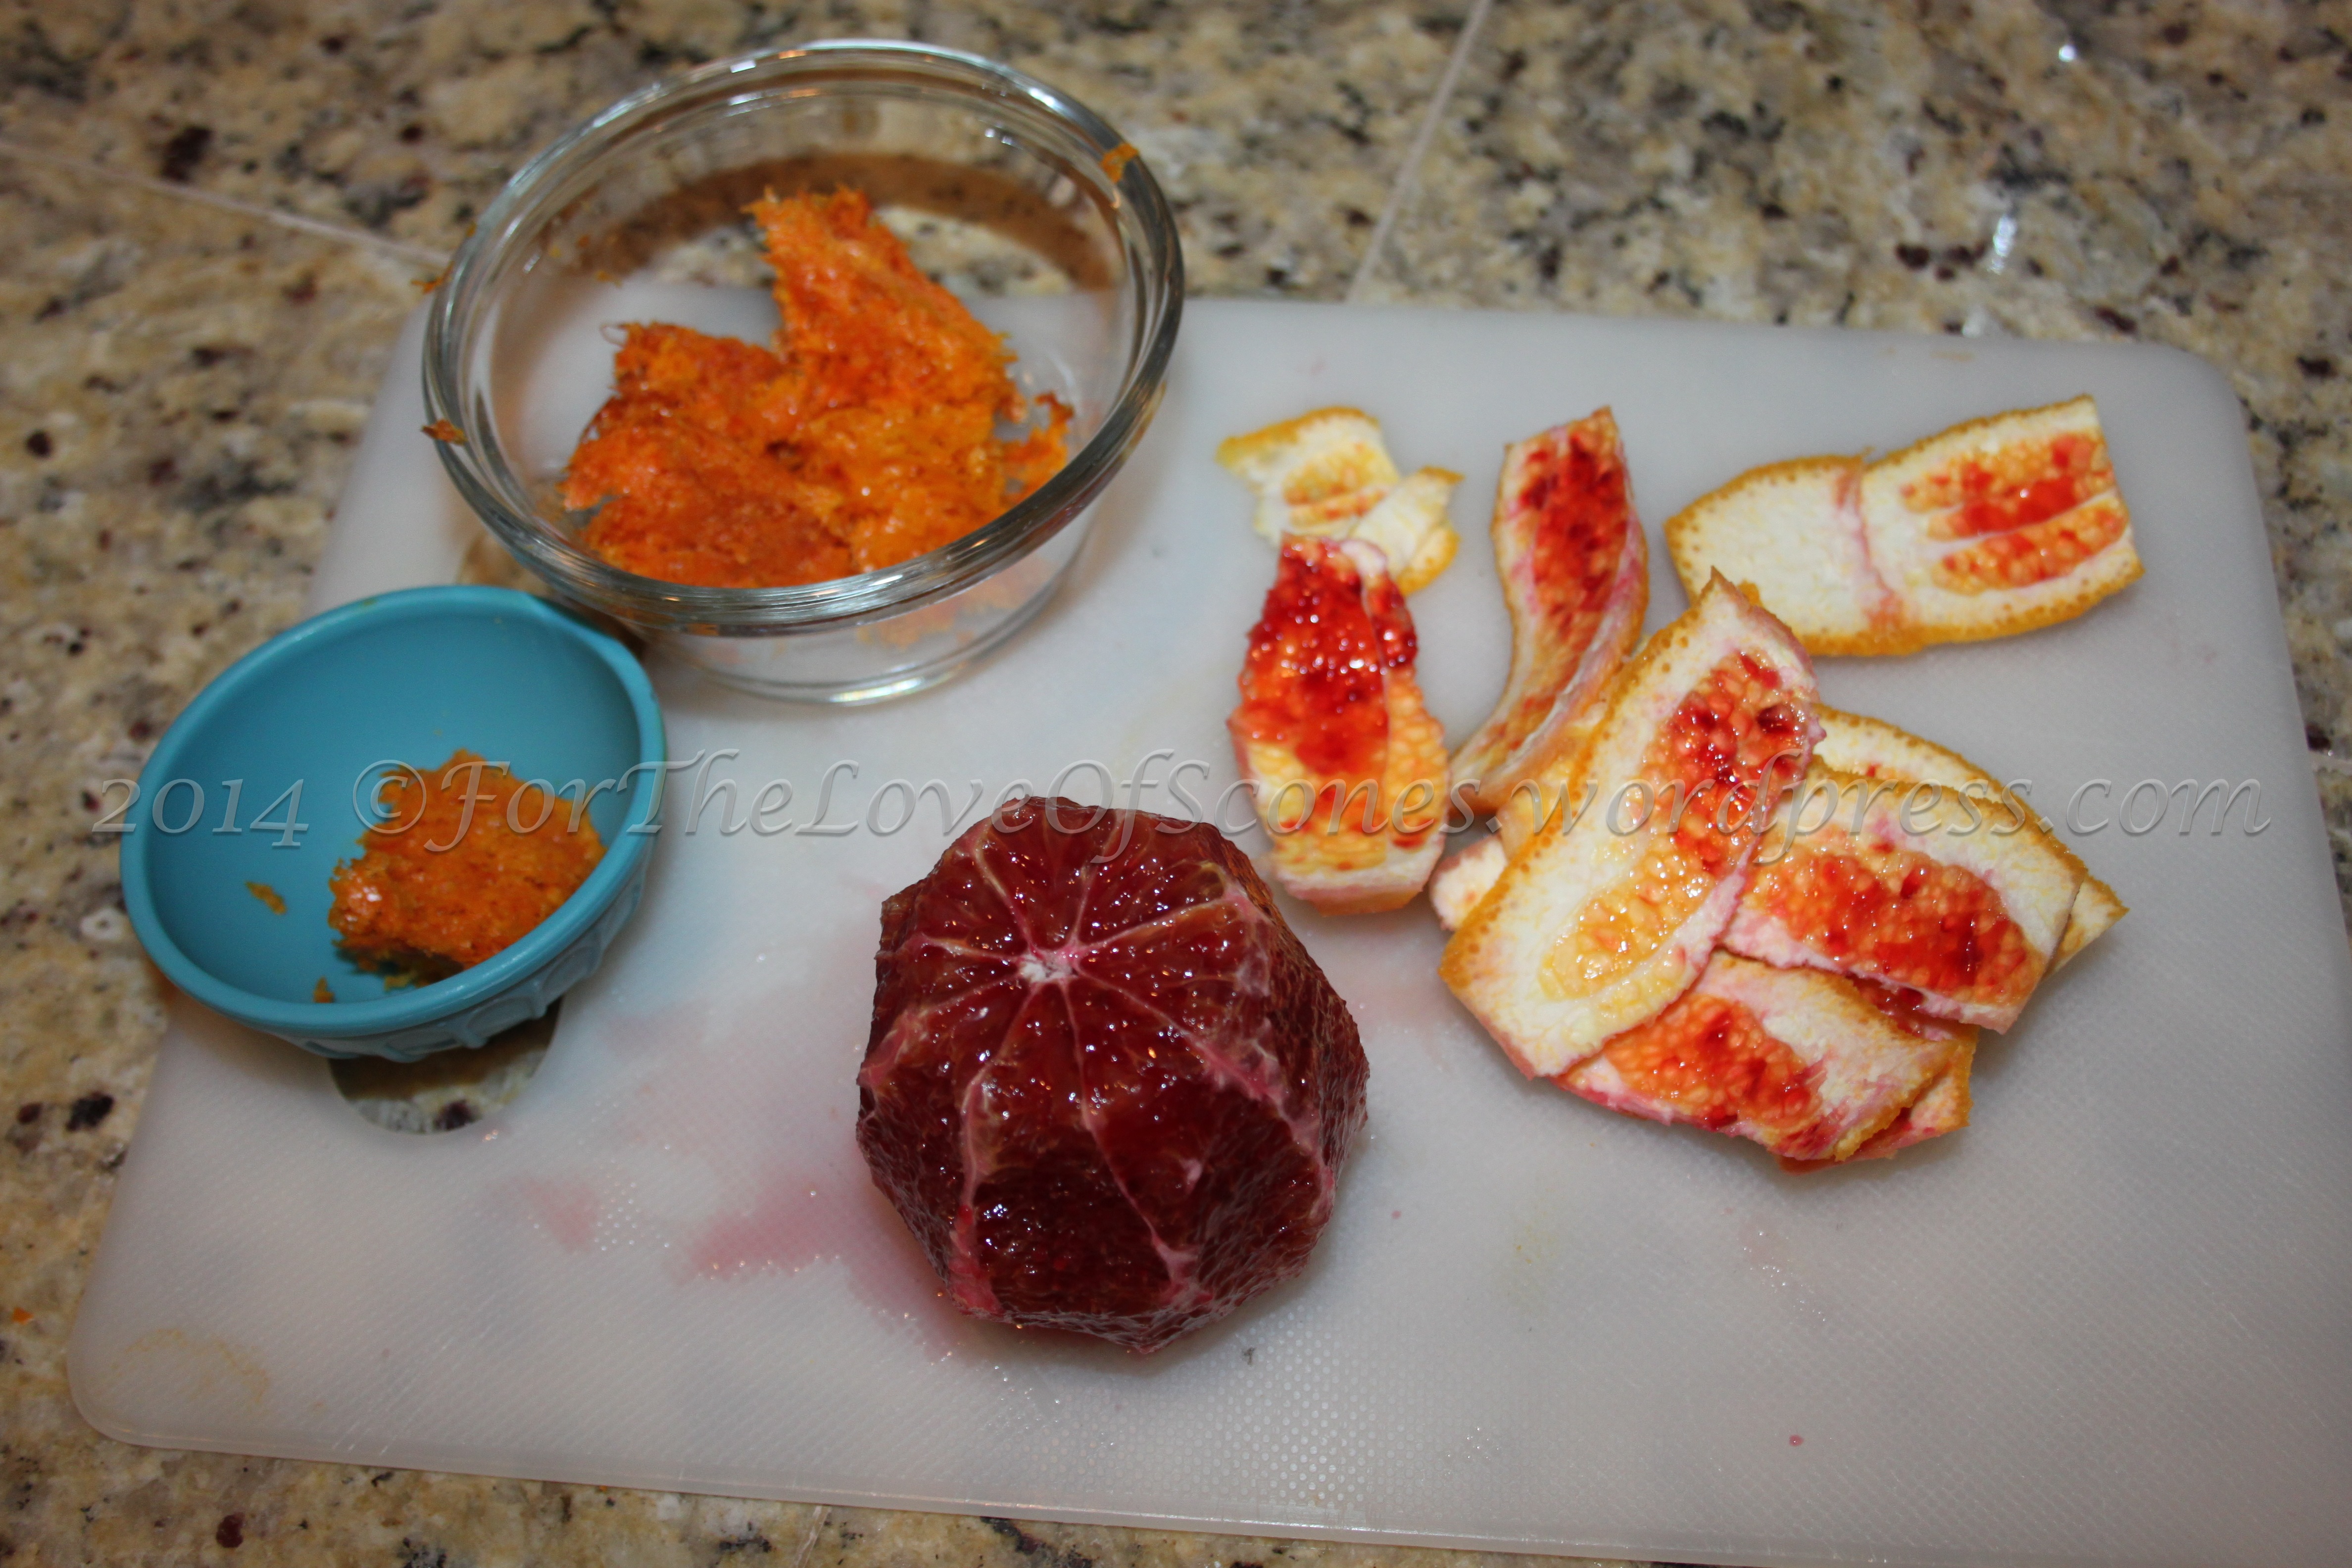
1) Zest all five blood oranges, keeping the zest of 4 oranges separate from the zest of the 5th orange. Set both aside.

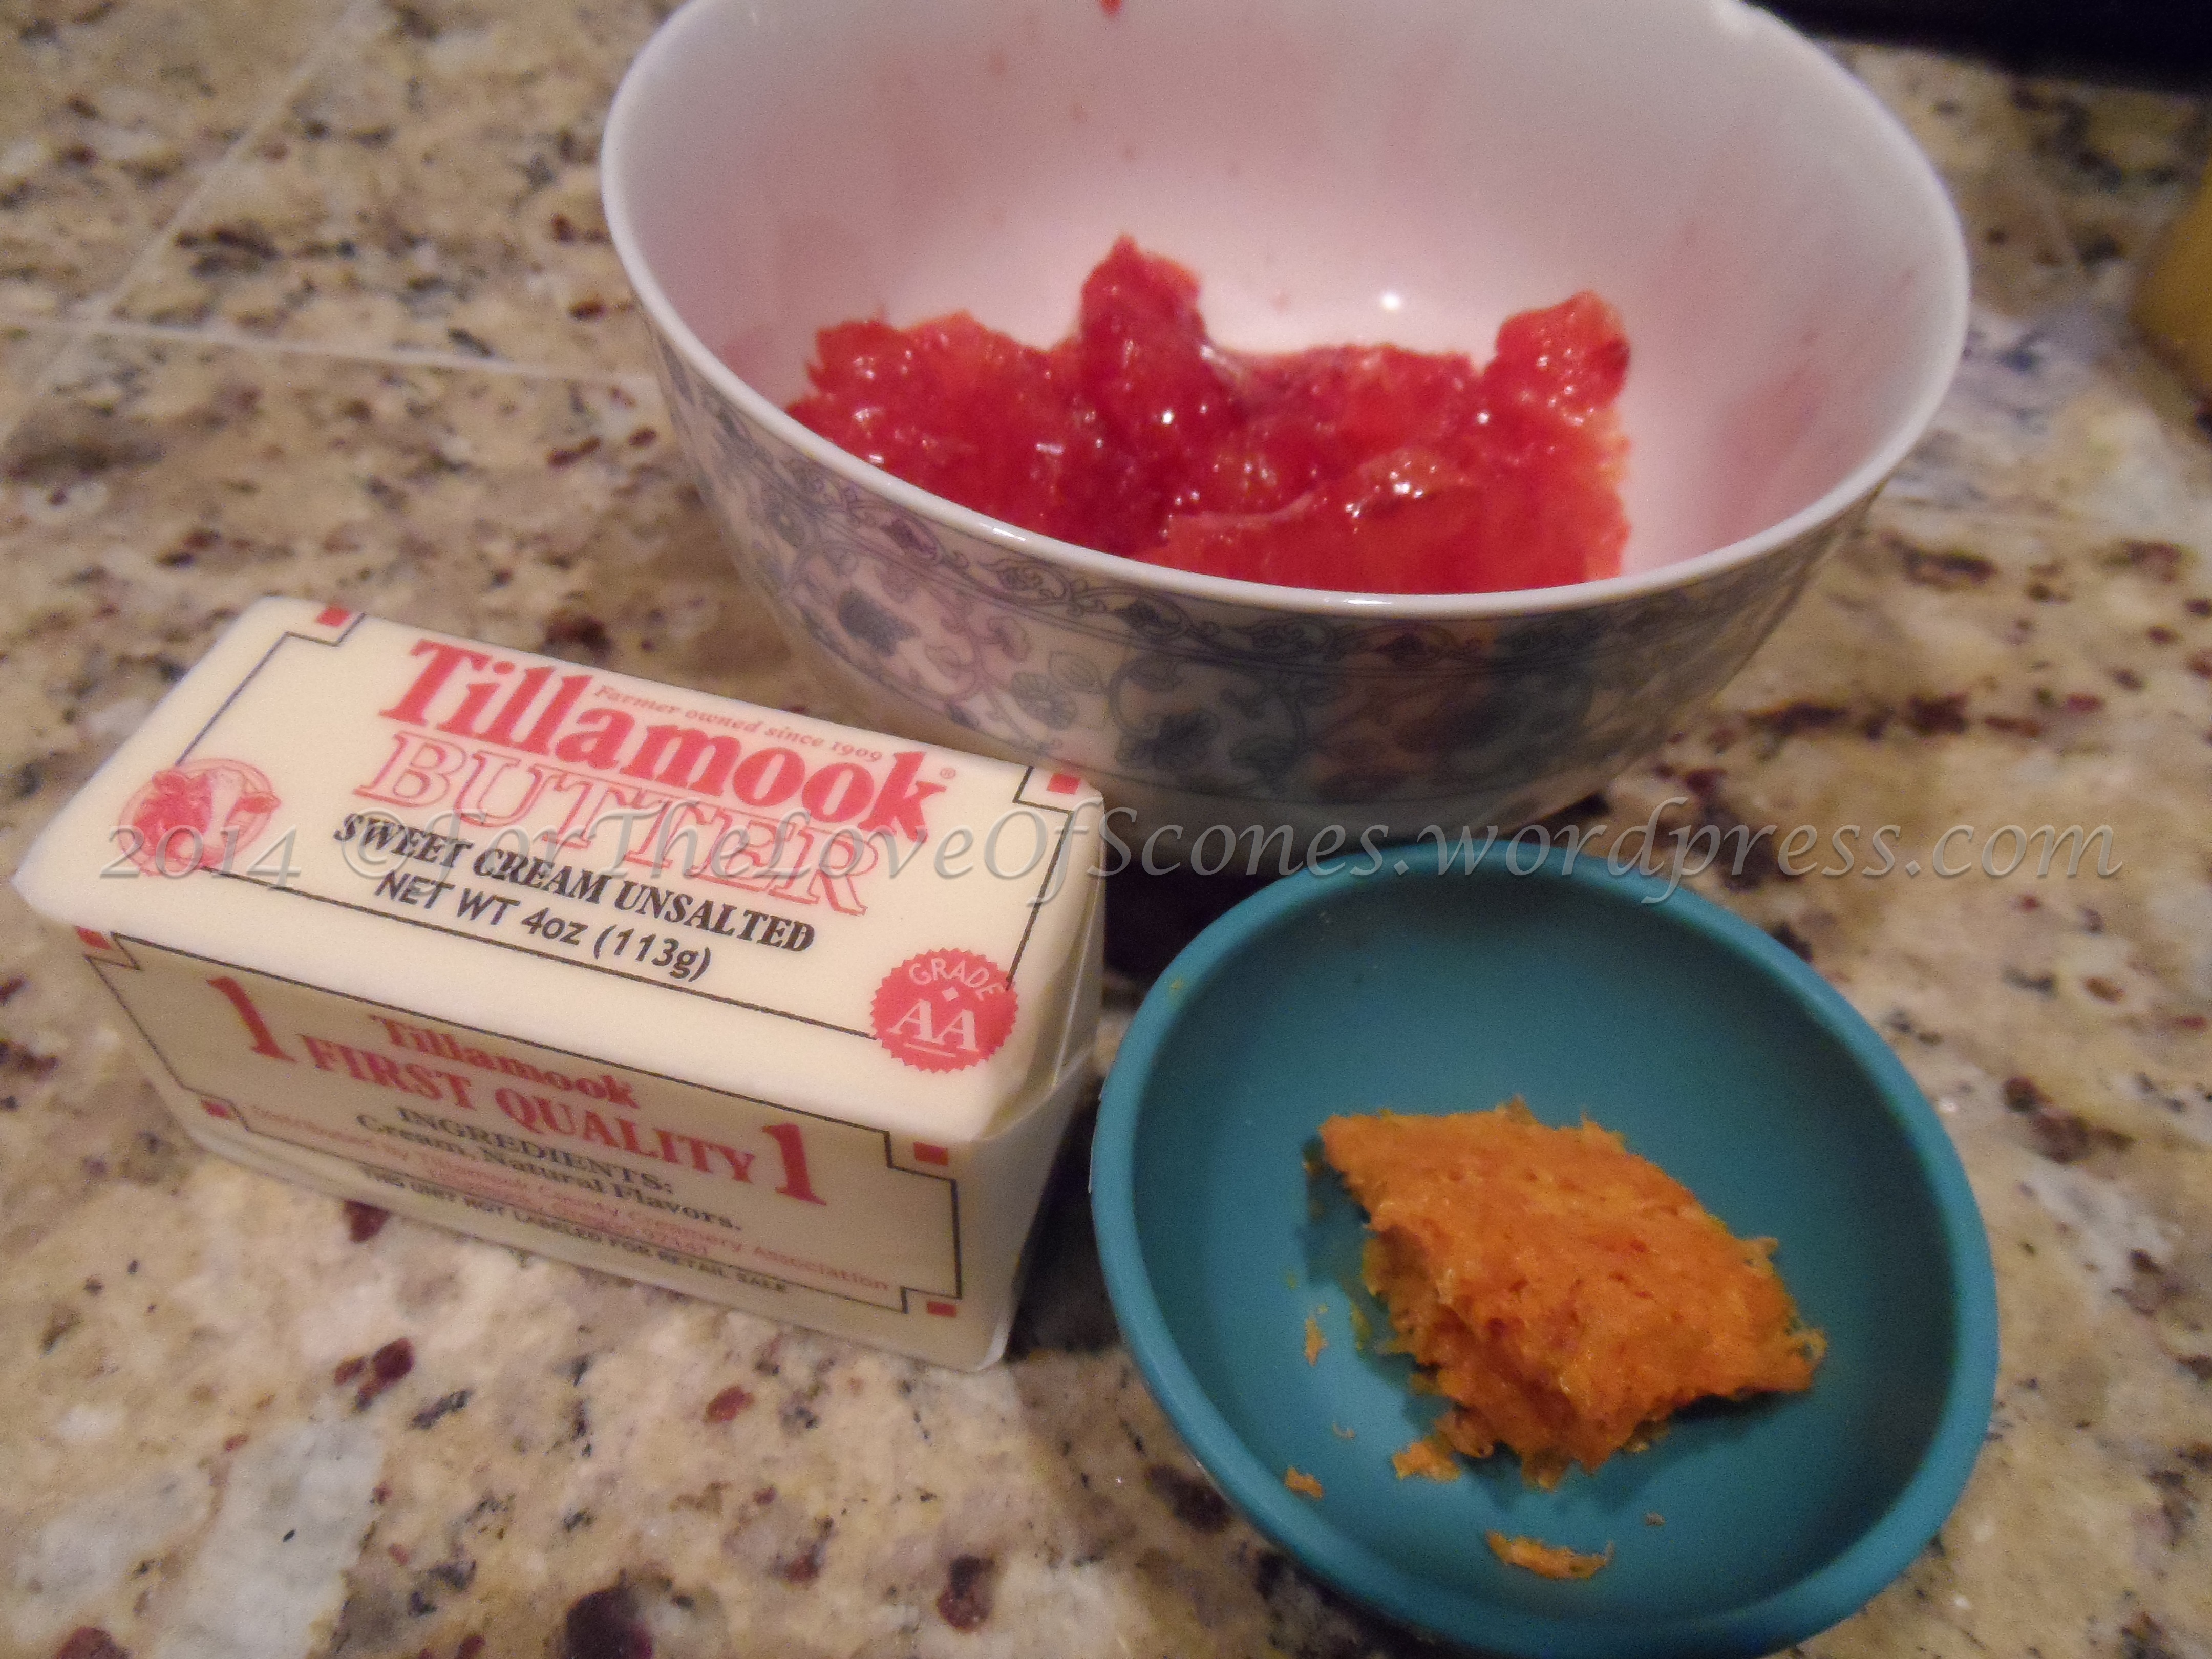
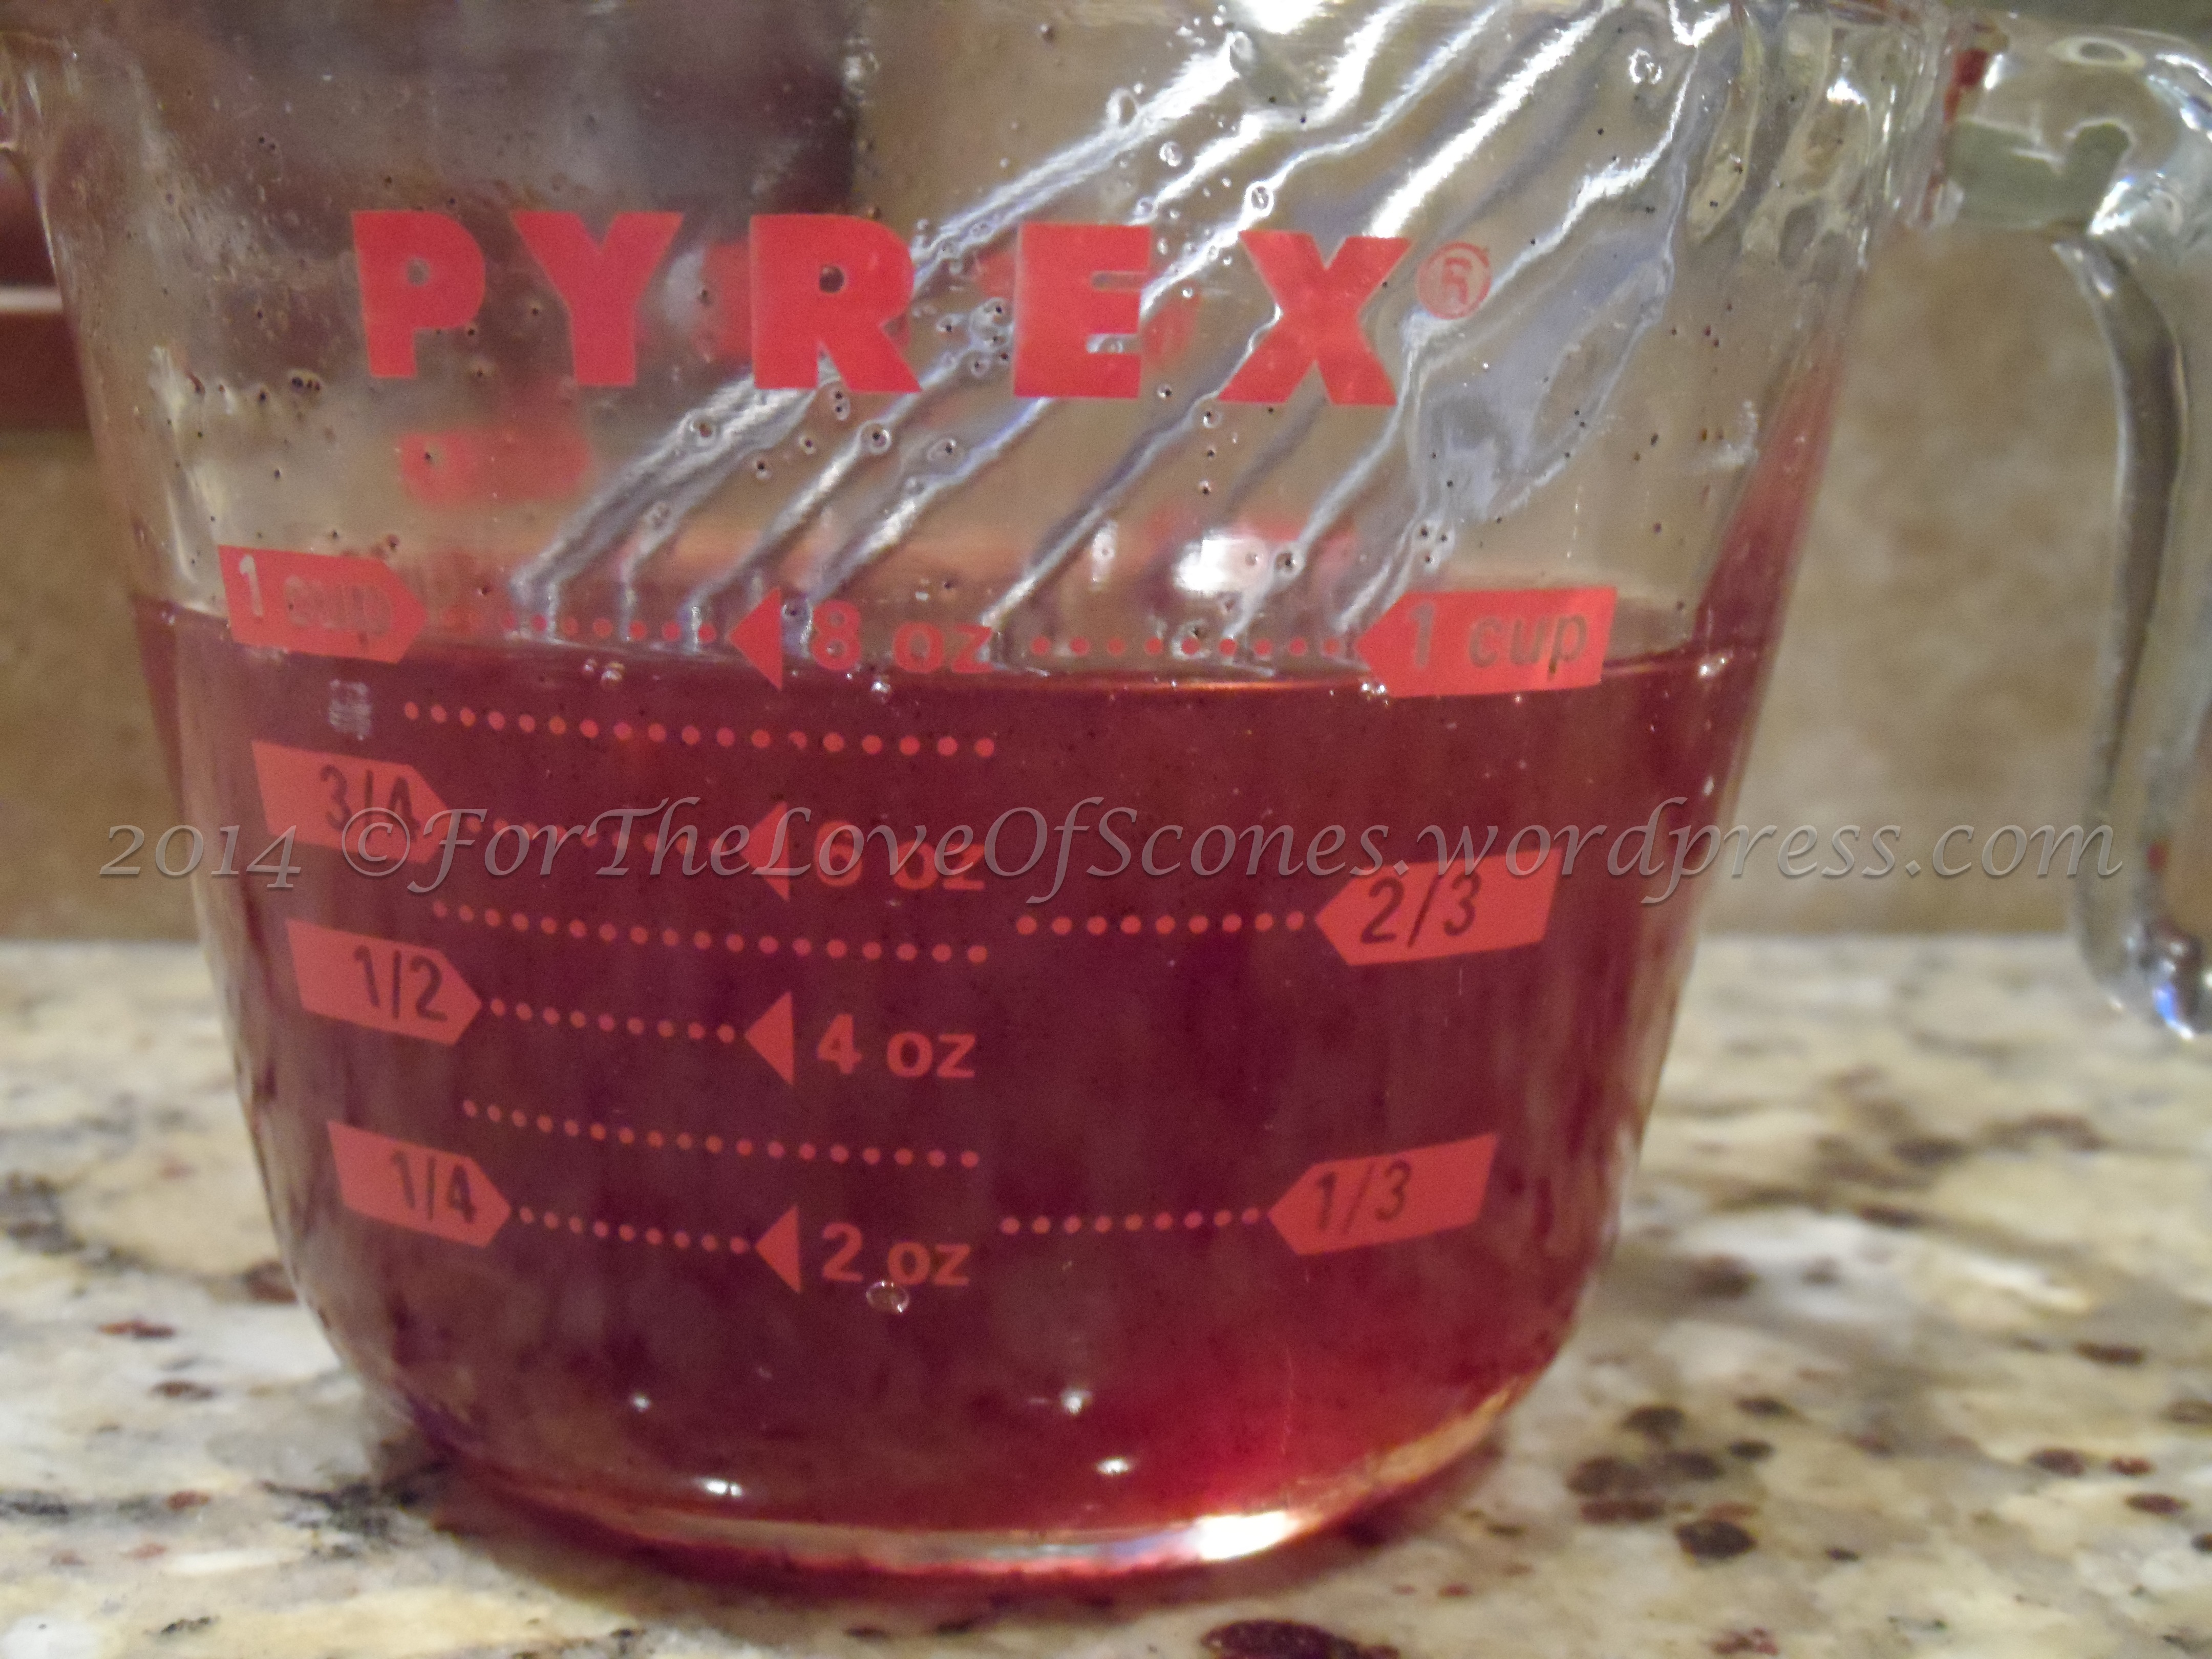
2) Using a sharp knife, cut the remaining peel off the orange, removing all the pith (white bits). Over a measuring cup, cut the juicy bits (carpel) out of the orange, leaving the membrane intact and in your hand. Repeat until all you have in your hand is the membrane and any attached pith. Squeeze the membrane together to get as much of the juice out of it as possible. You should have a measuring cup full of carpel and any orange juice that has dripped out while cutting. Repeat with the other four oranges. On the fifth orange, which will be used for the butter, set aside the carpel in a separate bowl, but use the juice for the main recipe. Set aside.

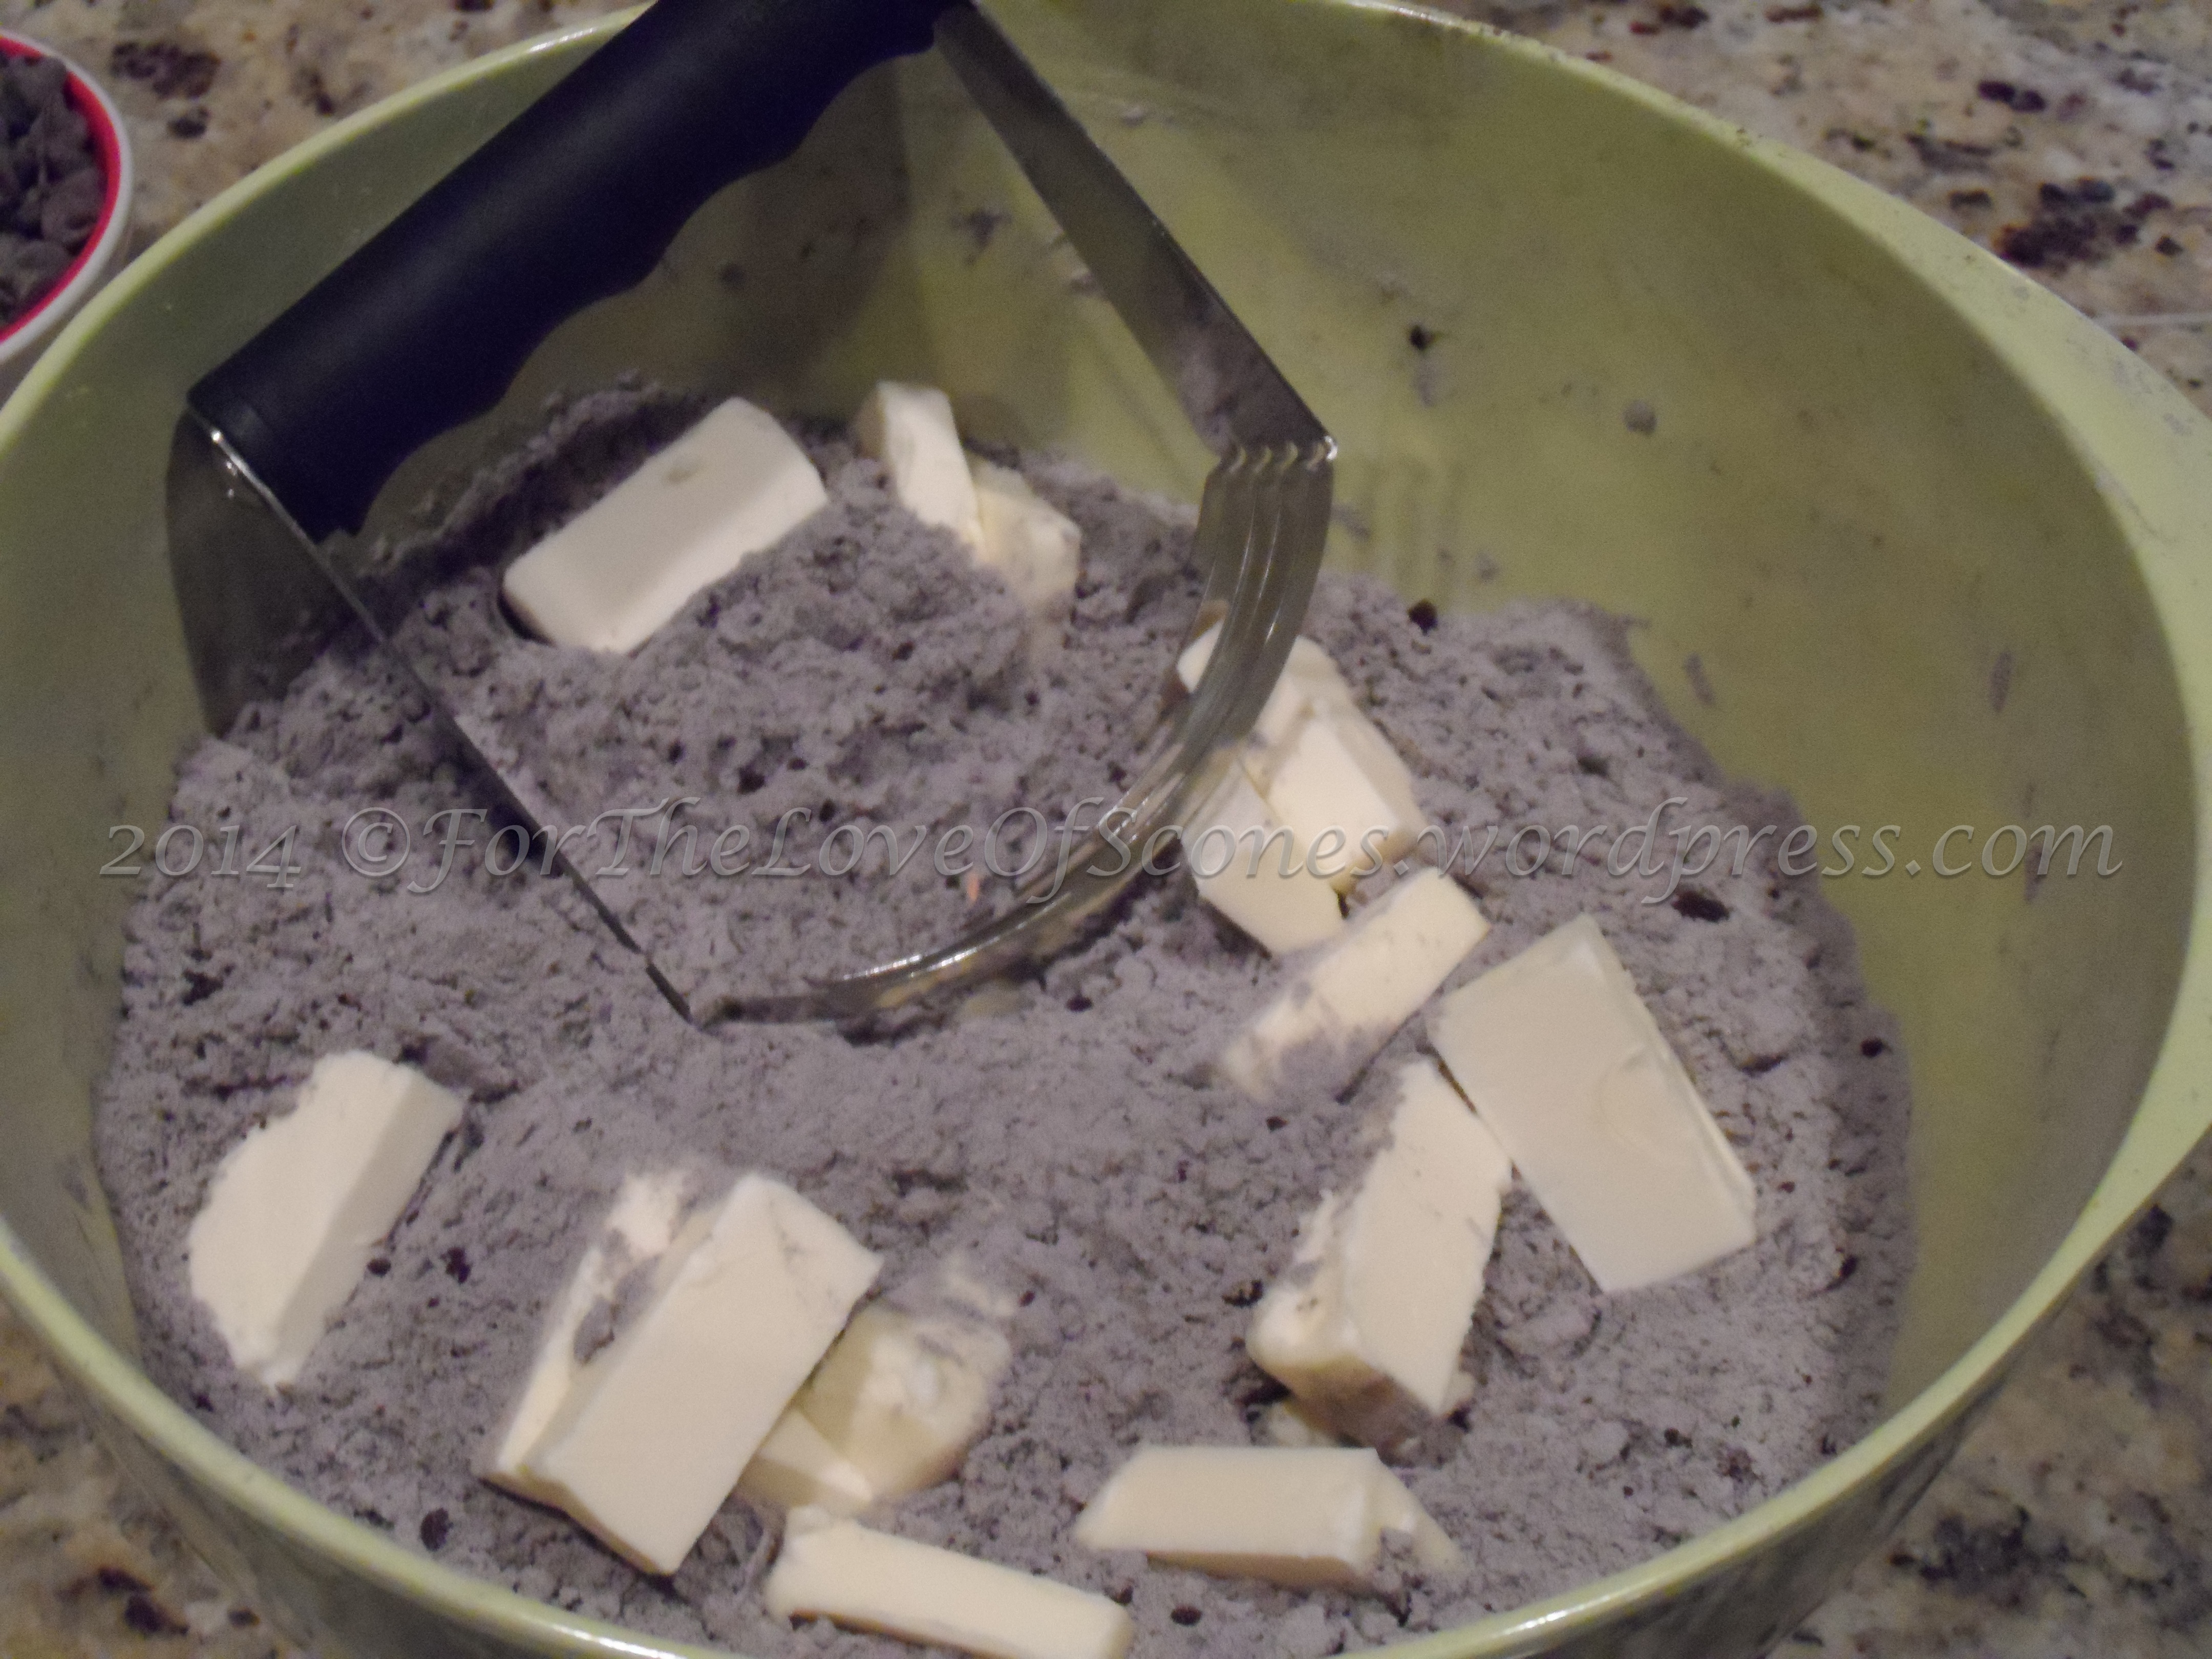
3) In a large bowl, combine the dry ingredients: flour, baking soda, salt, baking powder, unsweetened dark cocoa powder, and orange zest. Whisk to mix and set aside.

4) Add the honey and vanilla extract to the orange juice and whisk to mix.

5) Add the chopped butter to the dry ingredients and work in with pastry blender. Some pea-sized chunks are okay.

6) Add the chocolate chips to the dry ingredients and toss to mix.

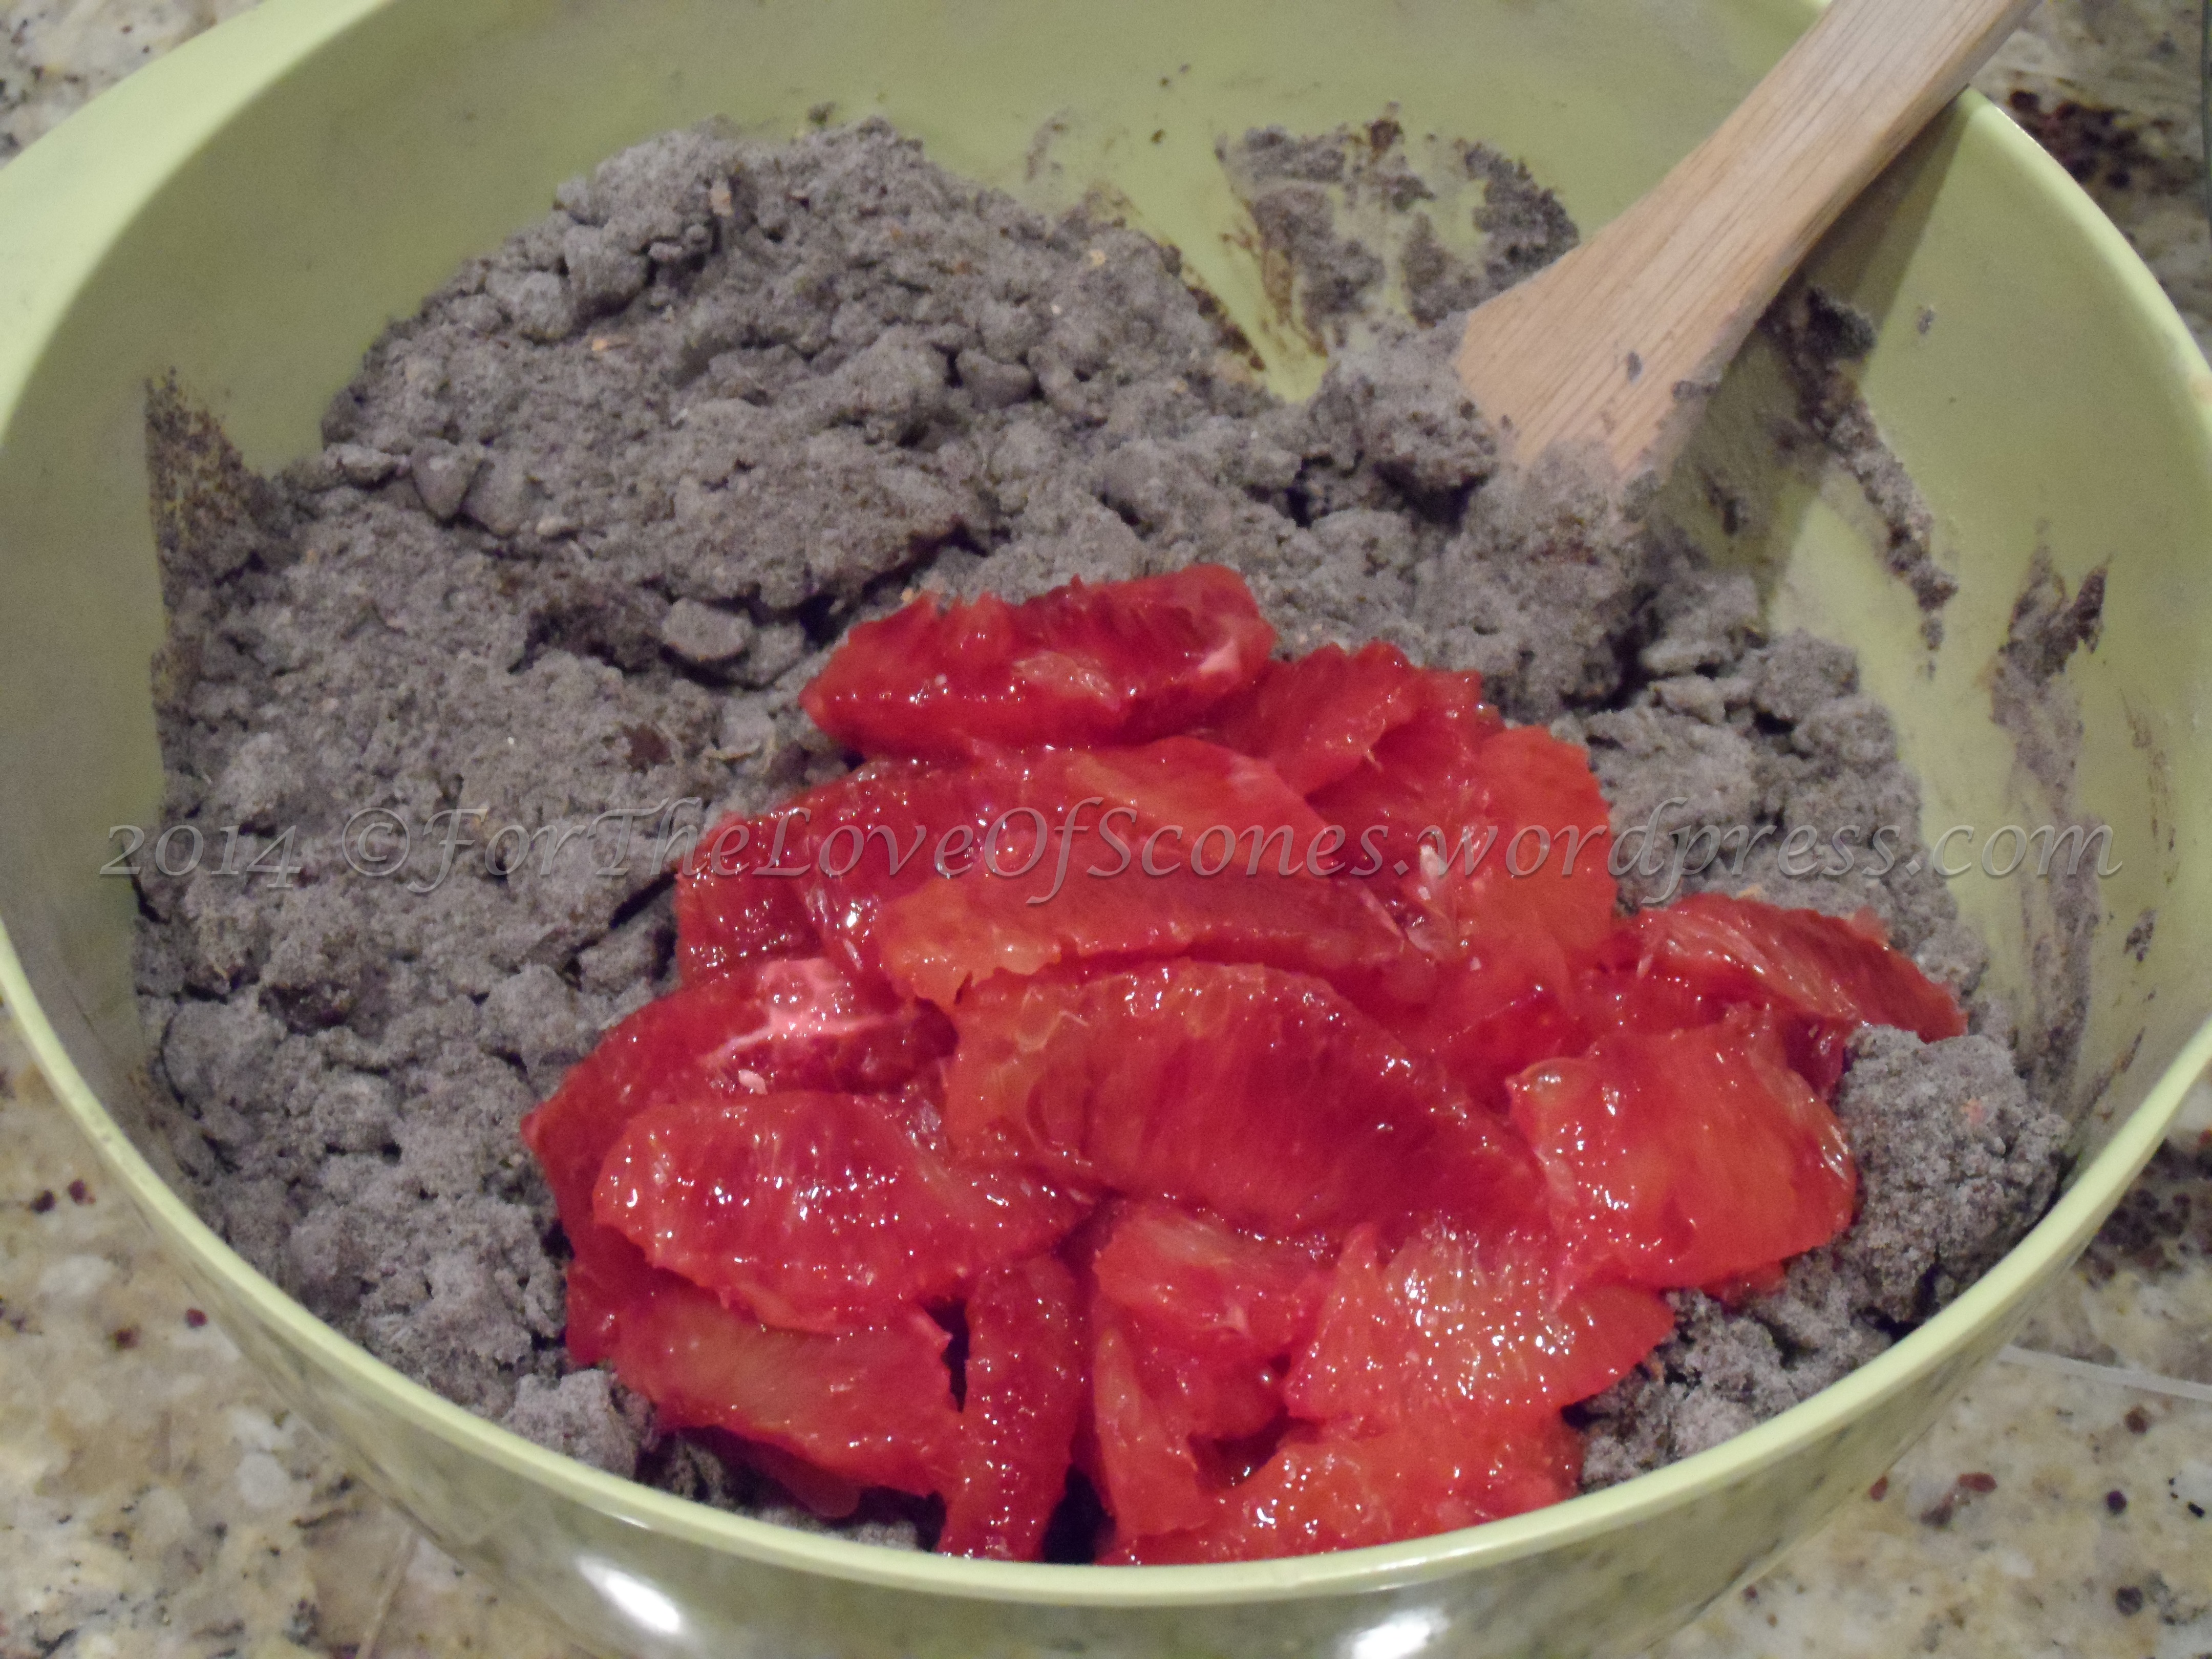
7) Add the blood oranges to the dry ingredients and toss to mix.

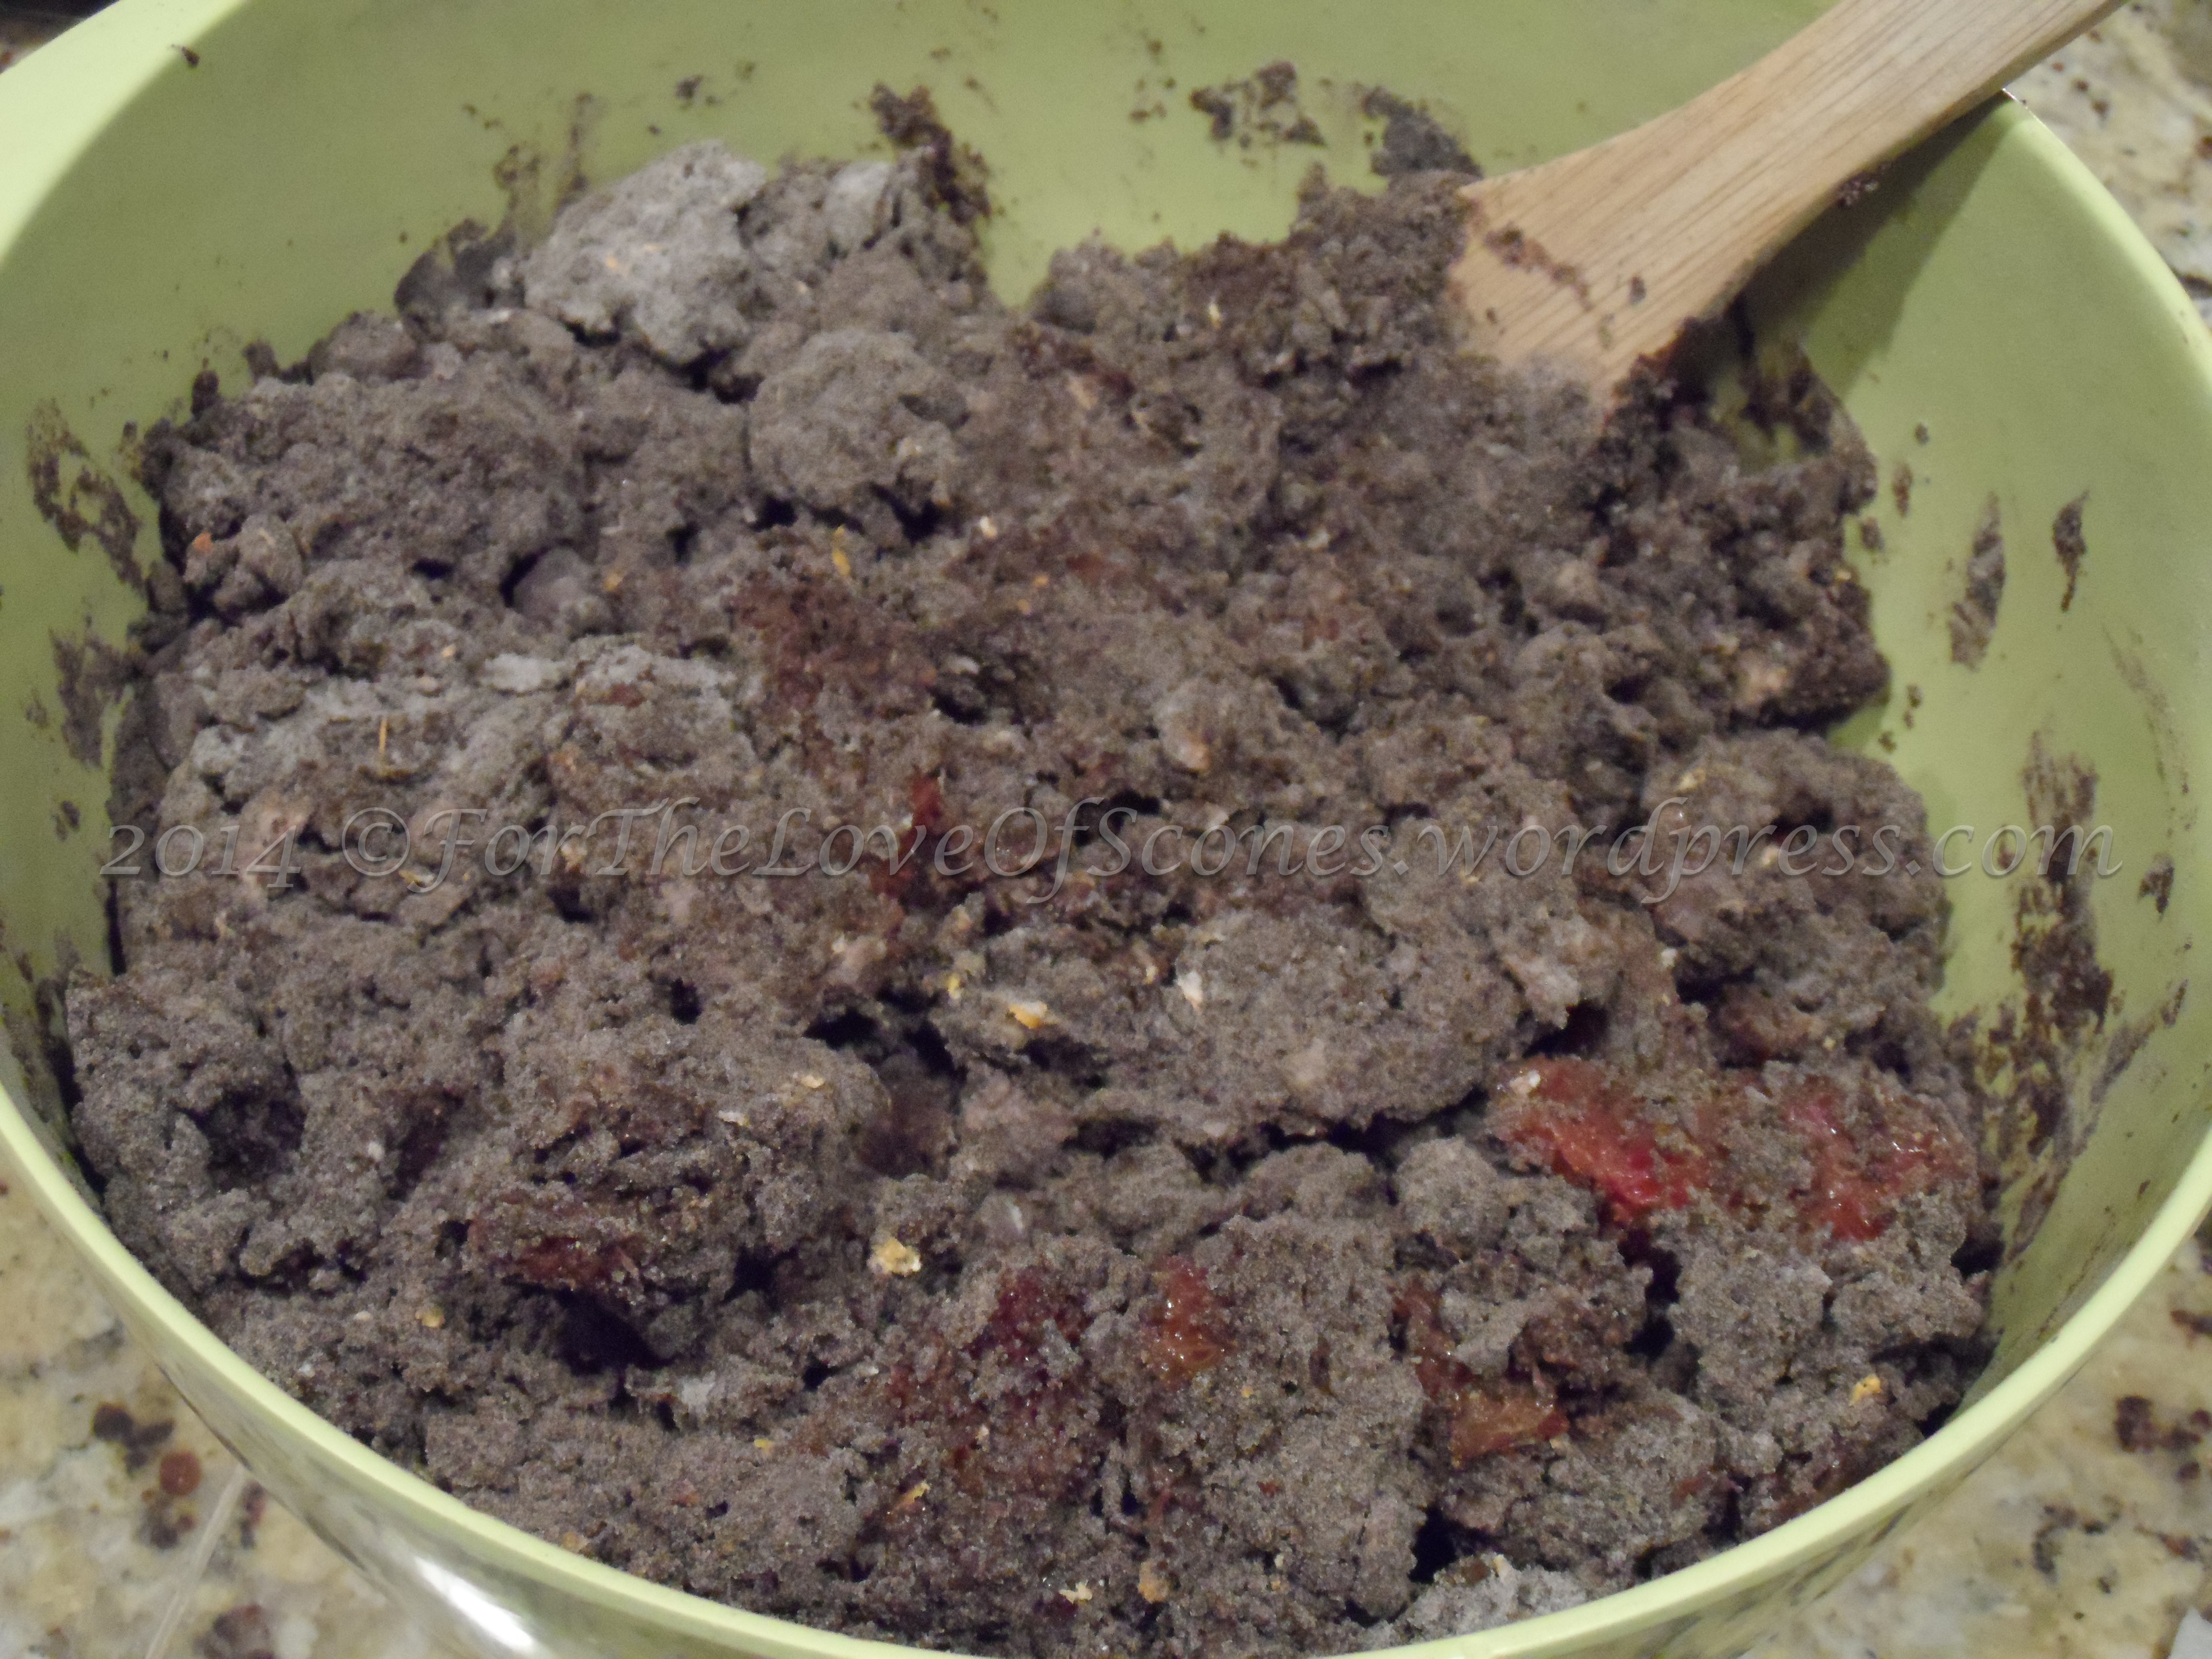
8) Add the honey-orange juice-vanilla paste mixture to the dry ingredients and mix with a wooden spoon.

9) Add heavy whipping cream until you have a slightly wet dough (about 1 cup).

10) Grease a 1/4-cup measuring scoop with oil and use to scoop out dough onto a parchment lined baking sheet, about two inches apart.

11) Sprinkle the scones with pearl sugar or coarse sugar.

12) Freeze for 15 minutes.

13) Preheat oven to 425ºF while the scones are in the freezer.

14) Bake on a parchment-lined baking sheet for 20-25 minutes or until dry on top and a cake tester (or toothpick) comes out clean.

15) While the scones are baking, take your softened butter and remaining orange carpel and combine along with the zest using a paddle attachment in a stand mixer. Mix for several minutes or until the butter is well mixed. Some juice may leak out, so just scoop out the orange butter and pour off the juices. Store butter at room temperature to keep it spreadable.

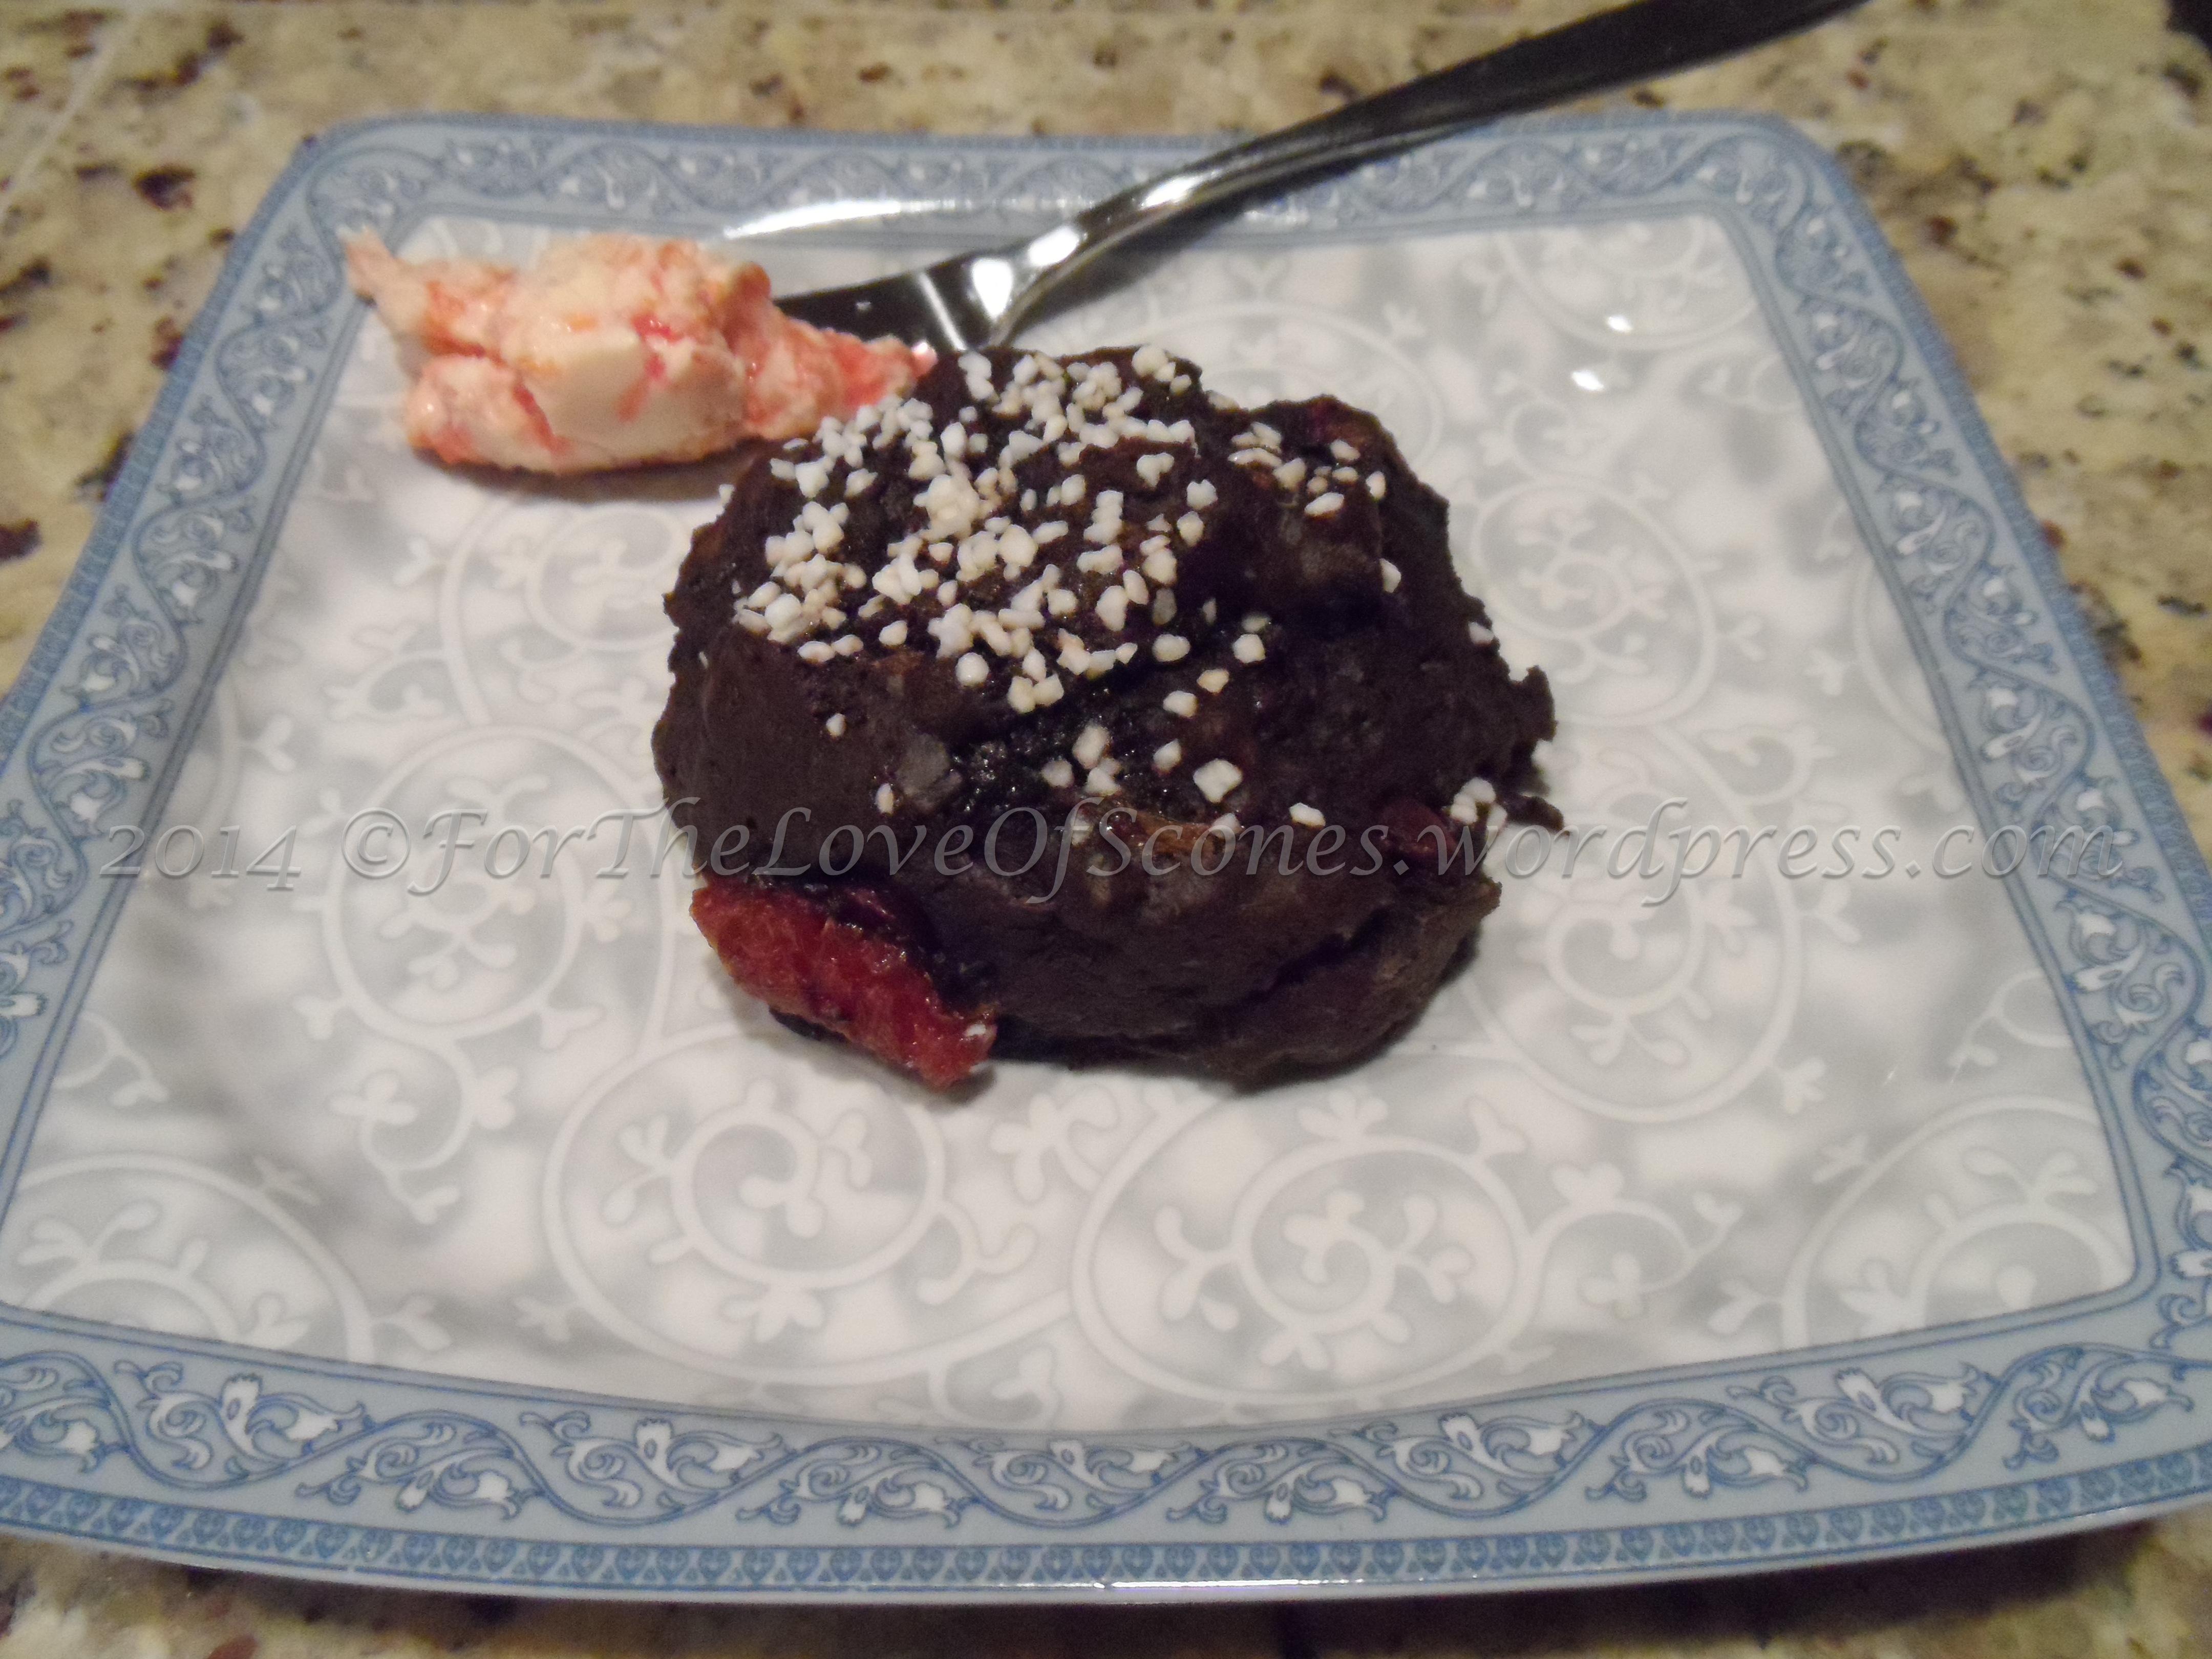
16) When scones are done, allow to cool on the baking sheet for five minutes, then remove to a cooling wire and allow to cool completely. Serve with the orange butter.

The Process:

Measure out your ingredients. This is a more complicated recipe than I usually make.
Measure out your ingredients. This is a more complicated recipe than I usually make. Make sure to separate the carpel from the orange juice, and to keep the carpel and zest of the 5th orange separate from the rest (that will be used for the orange butter).
Cut off each end until you get a nice, pith free view of the orange inside. These blood oranges are dark and sweet!
After you zest the orange, cut off each end until you get a nice, pith free view of the orange inside. These blood oranges are dark and sweet!
Zest your orange first, then cut off all the pith.
Holding the orange in the palm of your hand over a measuring cup, use a sharp knife to cut out the carpel, leaving the membrane in your hand. Allow the juices to drip into the measuring cup beneath the orange.
Combine honey, vanilla paste, and blood orange juice.
Ingredients for the blood orange butter.
Ingredients for the blood orange butter: zest, carpel, and butter (should be 2 sticks, not 1 as pictured).
Whisk together the honey, vanilla paste, and blood orange juice.
Whisk together the honey, vanilla paste, and blood orange juice. You should get about 1 cup of liquid.
Combine the dry ingredients.
Combine the dry ingredients: flour, baking powder, zest, cocoa powder, salt, and baking soda.
Whisk together the dry ingredients, breaking up any chocolate powder chunks. (If your chocolate powder is especially chunky, you can sift it before adding it to the dry ingredients.)
Whisk together the dry ingredients, breaking up any cocoa powder chunks. (If your cocoa powder is especially chunky, you can sift it before adding it to the dry ingredients, which I should have done. I couldn’t discern any large pockets of unsweetened cocoa powder in the finished product though.)
Using a pastry blender, work in the butter until only a few pea-sized bits remain.
Add the chocolate chunks and mix with a wooden spoon.
Add the oranges and toss to mix.
Add the juice from the oranges and mix well.
Add the orange juice, honey, and vanilla paste and mix well.
Add heavy whipping cream until your dough comes together with only a few dry bits.
Use a 1/4-cup greased scoop to form these scones, scooping them out of the bowl directly onto the parchment paper lined baking sheet. Flatten them out slightly so they are all even, and about 2 inches high. They will flatten out slightly when baking.
Space the scones a few inches apart from each other and sprinkle with Swedish Pearl Sugar.
Space the scones a few inches apart from each other and sprinkle with Swedish Pearl Sugar. Place into the freezer to chill for 15 minutes. During this time, preheat the oven and make the orange butter.
While the scones are chilling and/or baking, beat together the remainder of the blood orange carpel. Some juice will leak out, but that's okay. If you want, you can drain the juices out of the butter.
While the scones are chilling and/or baking, beat together the remainder of the blood orange carpel. Some juice will leak out, but that’s okay. If you want, you can drain the juices out of the butter.
Bake until a cake tester comes out clean. Let cool for 5 minutes on the baking sheet, then transfer to a cooling rack to cool completely.
Although these still taste delicious when warm, the texture improves upon these scones cooling completely. These are cakey and crumbly even after cooling for a few minutes.

Results:

I heard no complaints about this batch of scones. In fact, I heard overwhelmingly positive things about them–even from people who were a little wary of fresh oranges in a baked good. Trust me, these are tasty. Hubby and I had to exercise all our self-control to only split a scone. Okay, we split two. But we had to–I had to try one warm and one cool. It’s only right… This is on one of the rare scone recipes that we each ate a full scone. It really was that good. And the butter…mmm. It’s truly the perfect complement to the rich dark chocolate in this scone.

The blood orange butter is really awesome on top of these. A perfect complement to these rich scones.
Advertisement

Leave a Reply

Please log in using one of these methods to post your comment:

WordPress.com Logo

You are commenting using your WordPress.com account. Log Out /  Change )

Facebook photo

You are commenting using your Facebook account. Log Out /  Change )

Connecting to %s

This site uses Akismet to reduce spam. Learn how your comment data is processed.